The New Collection is Almost Here!

Gorjuss in her Spring and Summer Fun!

Dyan Reaveley Oh-So Vibrant spray is Here!

Create backgrounds on cards, scrapbook and journal pages, and in mixed media art projects. !

Cutters Dies!

From our favorite stamp company..WOJ, CC Designs and My Favorite Things!

Enjoy another great release from My Favorite Things!

Pure Innocence, Mouse in the House, Clearly Sentimental, A la Modes and Die-namics.

The one and only Henry the Mouse!

Fun, Upbeat and Animated designs perfect for traditional and classic styles!

Join the Fun!


Commenting Giveaway Alert: This week we will draw a name from all the comments left on this week's new posts and give away a $5 gift certificate! The more posts you comment on, the more chances you have to win.


5/31/11

Michelle's Gorjuss Tuesday Tip

Hello!  It's Michelle here with a Tuesday Tip...and my tip is to think of paper piecing when you need to make an adorable card in a time pinch.  I colored my Gorjuss girl's hair, face and tights with Copic markers.

E47, E44, E43, E42, E02, E00

I then stamped my image repeatedly on beautiful designer papers.  My image is popped up on foam tape and my darling paper pieced apples are sprinkled around the card for a fun embellishment.

Sorry I don't have more details for you, but my daughter is ill and fevering....so I'm off to cuddle.  I hope to have SEVERAL cards for you the next time I post!

GJ Little Red (Gorjuss) rubber stamp
Copic Markers
Wild Rose Paper - Milton

Michelle Pearson

5/30/11

iCopic Weekly Challenge #32

Hey everyone!! Samantha here to bring you another iCopic challenge!! This is iCopic Weekly Challenge #32.

The Challenge: Translucent Coloring
Color an image of something that is supposed to be translucent -glass, balloons, a vase, etc. If the object is supposed to be see-through, then it is fair game!


Copic Coloring Guide Book


For my project, I colored in pink bubbles. I used Copic colors RV000 and RV00. Then I accented each bubble with a white gel pen.  I also used some Washi Tape, a sentiment from the SP and Company I Love Love stamp set, and Wild Rose Studio patterned paper on the card.

Now get to work on your the translucent challenge and come back and show us! Entries are due by June 5th at Noon PST. The winner will be chosen at random and showcased on the blog on Sunday evening!

Post a direct link to your project below:

5/29/11

iCopic Weekly Challenge #31 WINNER!

Hey everyone!

I have a lovely winner to announce tonight!

The lucky winner from Challenge #31 is. . . 7. Michelle  


Michelle's gorgeous card is shown below:

SO CUTE!!

Congrats, Michelle! Please email us at info@icopic.com with your mailing info so we can get your prize out to you.

Everyone, make sure to join us again this week for another challenge!!

Saturday Spotlight (Late)

Hey everyone! Samantha here and I am so sorry for not getting the Saturday Spotlight up on time! It was totally my fault. I had a migraine the size of Texas and have been in bed feeling yucky.

Saturday Spotlight is a special spotlight of some of our lovely customers' projects!! Every other Saturday you will see some awesome projects that have been posted on our Facebook Page.

Want a chance to be spotlighted right here on our blog? All you need to do is upload some Copic creations to the iCopic Facebook Page and you might be picked!

I am going to do my very best to narrow my choices down to THREE each time we have a spotlight. 

Without further delay, here are some awesome projects made by our lovely customers and fans:


Mary McCarthy
The think I love most about Mary's card is that she COLORED her flower embellishment with Copics! It was customized perfectly to match the flowers around the Greeting Farm girl's head.

Carisa Zglobicki

Carisa's image is so beautifully colored that it almost looks real! I just love how she colored everything so realistically on this project.

Rene Bowen
On Rene's project, I loved all of her uses of browns. All of the different shades of brown are just so lovely together.


All of the projects uploaded to our Facebook page are awesome and I love seeing everyone's work. Please continue to share and inspire! I hope to see your work on there soon.

5/27/11

Under the Sea ~

Hi iCopic fans!  It's Alyssa here, back this week to play with dots some more!  Not sure why I'm doing this so very much, but I'm loving playing around with the texture of dots!  lol
This week I worked with a very appropriate hotty - 
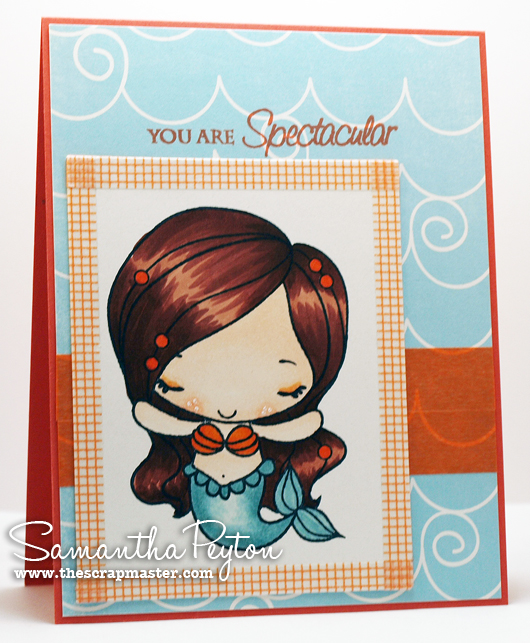
Syren of The Greeting Farm.  She is so very appropriate this week because of the new Johnny, er, I mean, Pirates of the Caribbean movie that came out this past week. 
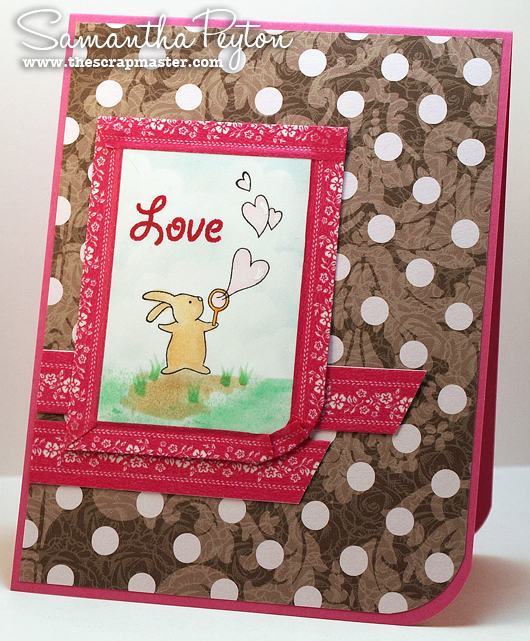
 I'm in the process of moving my crafty spaces, so didn't have a ton of stamps in my arsenal.  I needed a sea like background and always think of polka dots as a nice bubbly like backdrop.  I found a polka dot heart in SP & Company's Artsy Heartsy (sent to my by our fabulous former DT Diva Linda C!)  I turned the heart upside down repeatedly to stamp in the negative spaces of a line of hearts to create a polka dot strip.  It's not perfect...but it doesn't need to be!  It's just a background!

I colored up this little vixen and added dots of YG95, G99 and BG75 for some texture on her little fishy tail.  She's complete with make up and super rosy cheeks using R32.  Hair is something that gives me a real problem!  It quickly became a hot mess LOL so I just started scribbling some colors around and then blended with my lightest brown.  It's all about knowing your limitations and understanding that this is your artistic license!!  At least, that's what I tell myself!  ha ha ha
Little Miss Syren is sitting on some sand that is torn from Kraft cardstock and sponged with Ranger Antique Linen Distress Ink (the #1 Distress Ink you NEED!)  I used a few pearly buttons to represent some treasure and called this little cutie done!  Thanks so very much for stopping by! :o) lyss 
COPICS {BG70, BG72, BG75, E00, E02, E13, E25, E27, E29, E37, G99, R32, W3, W5, YG91, YG93, YG95}

5/26/11

Beach Baby Layout with Mini Misters

Hello everyone! Samantha here!

Starting next Thursday, you will be seeing Kelli here every Thursday bringing you a new project. But for today, you are stuck with me :)

Today's project uses the fabulous Mini Mister, which is one of the new Ranger products that iCopic now sells. I am really enjoying these neat tools!! I also used a sentiment from a new SP and Company stamp set called Round Sentiments I.

After the project photos, I have some tips for how to add finishing touches to your scrapbook layouts.

Some tips for adding finishing touches to your scrapbook pages:
  • Around some of the sticker elements, I used my black multiliner. This creates depth for these elements.
  • Also, you can outline elements with your Copic markers. Around the edge of the circle (it says Happy happy), I used a Copic marker from iCopic.com, BG45 and created an outline to make the element stand out.
For complete layout details, click here!

Well, I hoped you enjoyed my project for today! Alyssa will be back tomorrow with another lovely project. Also, don't forget to play along with this week's iCopic challenge!!


5/25/11

More Gorjuss!!

Dana here and I cannot wait to share these two fun (and fast!!) projects with you!! Do you ever find yourself in a bind and want to make something pretty quick but still want it to be unique and handcrafted? You HAVE to check out the new Decoupage sets icopic is carrying!! I've used the Pirate and Awash set and I just love the way they turned out!! You get the decoupage sheet and a matching piece of cardstock.
This first one is the Pirate:
There are three elevations on this one:
The whole thing made me think of Jack Sparrow and the new Pirates of the Caribbean movie coming out so I just had to add some hemp with beads!
And the other one with the mermaid is just as cute, just not as many layers on this one:

Here's a side shot so you can see her popped up and a close up of the bow:

That is just chalk white seam binding that I dyed with my Tim Holtz Distress Inks. I layed the seam binding on a piece of wax paper and ran my pads right across it. I used Dusty Concord, Peeled Paint and Faded Blue Jeans. Then I spritzed it all with Copper GlimmerMist and scrunched it up real good to give it that crinkled look.  Then I dried it with my heat tool just fluffing slightly and continued to wipe up the puddles of color on my wax paper.  I love how it turned out!! 
Ok, so you know I just had to make a card with my copics too, so.... 
Oh my gosh.. I LOVE this image from Sarah Kay for Stampavie!! Is she not just the sweetest? I wanted to keep her hat, dress and kitty pretty much white.  My favorite colors for shadowing whites are BV20, BV23 and BV25.  Are you sick of this post yet or do you want to see one more close up?

 The sentiment is from Amy R's Sassy Sentiments set.  I also need to mention that gorgeous (and funtional!!) Divine Twine I used to attach my button to my ribbon!! Love that stuff!!
Thanks so much for looking!! I hope to see your creations in this weeks challenge!

Hugs~


5/24/11

Tuesday Tips and Tricks: Washi Tape Frame Tutorial

Hello everyone!! Samantha here, bringing you another Tuesday Tips and Tricks.

Today I have a video tutorial for you on how to make the cute Washi Tape frame I used on this card:


And here is the video:


 Isn't that easy?! I thought it was just so simple yet so pretty. The frame really finishes off the card.

This cute little Image is Mermaid Anya from The Greeting Farm. These stamps are just too darn cute!!

To color the image in, I used the following Copic colors from iCopic.com: E0000, E000, E00, E02, BG70, BG71, YR68, YR07, YR16, E15, E18, and E29. I accented her cheeks with a white gel pen.

The sentiment is from the SP and Company Mix n Match Friends stamp set. I designed this set so that you could mix and match the words/phrases to create whatever sentiment you would like.

My complete card details can be found by clicking here.


5/23/11

iCopic Weekly Challenge #31

Hey everyone!! Happy Monday! Samantha here bringing you another challenge.


This week's challenge is going to be fun because it really lends itself for you all to explore and be super creative!

The Challenge: ADVANCED SHADOWING! Create an advanced shadow behind your image.

Entries are due Sunday, May 29th at Noon PST. Add a direct link to your creation up in the linky widget.


For my card, I created a shadow behind the cute Edward stamp from The Greeting Farm using the following Copic colors: C0, C1, C2, C3, and C5.

 And Rachel created this beauty with the Fawn Lawn stamp set called Plus One. Notice her subtle, yet very realistic shadowing she created under the oven:
 

On Sunday evening we will choose a winner at random and showcase them on the blog. Plus, they will win the lovely prize above.

Good luck and link below:

5/22/11

Winner Challenge #30

Hello everyone! Samantha here to showcase the winner of the iCopic Weekly Challenge #30! Everyone's blond hair projects this week were AWESOME!!

The winner, as always, was chosen at random using Random.org.

Our winner is 16. Lis (ThePurplePlace) !!
Lis created this lovely card for our Blond challenge:


 Beautiful creation, Lis and congrats!!! Please email info@icopic.com with your information so we can get your prize mailed out.

Lis has won this awesome book:


Join us Monday morning for another fun iCopic challenge!

5/21/11

An iCopic Card Duo!

Hello! It's Michelle here with two happy spring cards for you today!

My first card features the For Every Woman set from SP and Company. I colored my image with the Copic markers shown below and then fussy-cut the image and popped it up on foam tape for dimension.

I framed my image with Spellbinders Ovals and Scalloped Oval dies. A touch of piercing finishes my focal image frame.

Friend is from SP and Company's Candy Hearts set.


My second card features the adorable Magnolia Tilda with Hanging Rabbit image. I colored my image with the Copics pictured below and fussy cut her as well. She is popped up on foam tape for dimension.

Hugs is from the SP & Company Candy Hearts set.


Happy Spring!

5/20/11

Gracias!

Hola amigos!  Thanks to Samantha for covering for me last week!  I got stuck at work when one of my employees called in, so Sam came to my rescue!  And with a super fabulous and *Gorjuss* creation, no less!
This is Rosa from Mexico.  She is one of the sweet little characters from around the world made by Your Next Stamp.  I used E11, E13 and E15 to make her skin a little more ethnic.  Her dress is colored with R24,R27, R29 and R59...I'll let you in on a little secret!  I made a rather large boo-boo on the bottom of her dress!  Try as I may to push that color back in with the colorless blender, it just kept bleeding out.  I covered it up with a white gel pen!  Go ahead, click on the pic and make it bigger so you can see where...I'll wait here...........   Not too shabby, eh?  It's not the best cover up, but it beats starting all over!
The ground is something new!  I wanted to create a shadow of her, so I shaded with E37, E33 and E31.  It looked a little flat, so I added dimension with some dots of each of the colors.  Kind of fun, don't you think?  
The cactus image is a bonus that you get with Rosa.  The sentiment is from my stash.  I added just a bit more interest to this easy to mail card by stamping the cactus in VersaMark around the border of the card base.  Thanks so much for stopping by!  Hope you all have a fabulous weekend!  :o) lyss
Copics {B000, B28, C1, C3, C5, C7, C9, E08, E11, E13, E15, E19, E31, E33, E37, R02, R20, R22, R24, R27, R29, R59, Y11, Y15, YG63, YG67, Lemon Spica}

5/18/11

Just Gorjuss!!

Dana here and I cannot wait to share with you all the fun stuff I got to play with yesterday!! This is a long one, so  get a cup of coffee and sit back! I'll start with the finished card first so as I show you the work in progress it will make sense.
That is one of the amazing new Gorjuss stamp now being carried at icopic! This one is Puddles Of Love. Lots went into making her because she is not only shaking her booty (shaker card) she is also paper pieced. First here's a close up of just the image:
Wow!! She's really getting rained on!! Ok, so I warned you, here comes all the parts that went into making this. It's got a little surprise twist!
First I stamped her with Memento Ink in Tuxedo Black on Copic X-Press IT paper and on two different patterned papers.
Those blue polka dot pieces have already been cut out. I then shaded all of my paper pieces with my copics. I find it's easier to do that before I glued it down just because I tend to get glue everywhere!
Here's where my card took a wonderful turn. I used Washi Tape to create a large portion of this card! This was my first time using this product and  I love this stuff!! The one I used is actually from the Coffret du Coturier Blue set.  You can see here I started building my shaker portion by cutting out a nestie shape. I created the ground line with the washi tape and  then I glued down my X-Press IT piece. 


And then the other layers:

Then the fun really started! I gathered together a bunch of seed beads, mini balls and bugle beads for my "rain". This card sounds sooo cool when I tilt it! It actually sounds just like rain!


I never saw those red ones until I was editing these pics. Who knows if it made it into the final card or not.. lol!
I cut a piece of transparency with the same nestie. I added foam tape all the way around the image panel leaving one section with the paper still on it to add my beads into.
Now this is where I had my happy accident! Originally I had planned on using a frame I had cut with the same nestie shape but my foam tape showed in places. So I decided to cover those bits with more Washi Tape. Well, I ended up using the Washi Tape to complete the rest of the frame and I LOVE how it turned out!!
Because the tape I used is thinner I just did two widths. It was really easy to line up the pattern. Then I cut it in small sections and folded it to the back.

I used my bone folder to really accentuate the curves of the nestie shape. Here's a close up of the frame after I attached it to the card base:

And once again, just so you don't have to scroll back up is the finished card:
The sentiment and raindrops are from the Rain Boots set from SP & Company. I also used Wild Honey and Tumbled Glass Tim Holtz Distress Inks by Ranger around all of the panels. 
Don't forget there's still plenty of time to enter our blonde coloring challenge this week! 

Hugs~


TwitterFacebookFavorites More