The New Collection is Almost Here!

Gorjuss in her Spring and Summer Fun!

Dyan Reaveley Oh-So Vibrant spray is Here!

Create backgrounds on cards, scrapbook and journal pages, and in mixed media art projects. !

Cutters Dies!

From our favorite stamp company..WOJ, CC Designs and My Favorite Things!

Enjoy another great release from My Favorite Things!

Pure Innocence, Mouse in the House, Clearly Sentimental, A la Modes and Die-namics.

The one and only Henry the Mouse!

Fun, Upbeat and Animated designs perfect for traditional and classic styles!

Join the Fun!


Commenting Giveaway Alert: This week we will draw a name from all the comments left on this week's new posts and give away a $5 gift certificate! The more posts you comment on, the more chances you have to win.


3/31/12

CC Designs - Note Card Holder

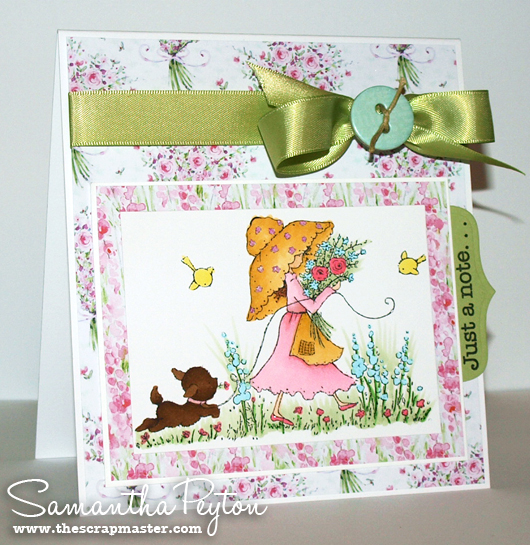
Hello iCopic Lovers!  Tracy here today with a super simple note card holder. I used a grand nestie die for the base then I added a simple 5x4 box (diagram below)to create a note box holder. 

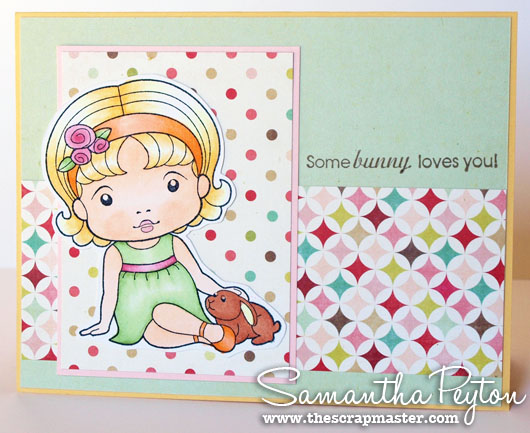
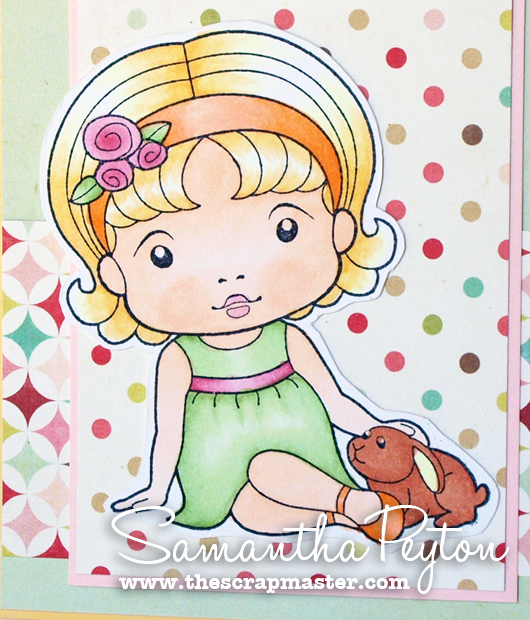
The background paper came from a 6x6 Bo bunny paper pad called Country Garden, which is available in the store. The stamp used is CC Designs - Swiss Pixie Party Time Lucy

Image is colored with Copic markers
Hair: E21, E23, E27, E29
Dress: RV10, R81, R83
Stockings: B00, B02, B04
Bow: YG11, YG13
Shoes:  E42, E43, E44

I created a couple of small simple note cards to add to the box.

Below is the dimensions that I used. The grand nestie that I used was the largest in the grouping. It's about 6 1/2 inches wide. I scored it around 3 inches in and butted the notecard box up to the score line. Then embellish as you desire!

Thanks for looking today and come by the store and check out all the new goodies that have arrived!

Hugs,
Tracy Valure

3/30/12

So happy for you!

Hi, everyone!  It's Kelli and today I have a very summery card to share with you.  I used the Hula Anya stamp by The Greeting Farm and stamped her in Memento - Tuxedo Black Ink.  I used a lot of different patterned papers so I wanted her to match them pretty well.  I decided to color her using Copics:
skin: YR00, E00, R20 and R22 for cheeks and eyelids
hair: E31, Y35, Y21, Y15, Y11
skirt: G28, G24, G21
flowers: YR18, YR16, YR15
I stamped the image a second time and colored the flowers, cut them out and popped them up on some dimensionals.  To help tie in the image more, I used the background paper to paper piece her bikini top.
Thank so much for stopping by, have a great day!  :)


3/29/12

Chocolate? Did Someone Say Chocolate?


Hello Copic lovers!   Marie here and it's 3-D Thursday!   I used an adorable Tilda image called Tilda With Pony Tail from Magnolia Stamps for my DT project.    Isn't she so cute!


I don't know about you but I am always looking for a quick table favor or a little gift to give someone and this is a gift I just love to give.

Skin tones:  YR0000, YR000, YR01 and a touch of R20

Light Blond Hair:  Y11, Y21, E97, E99


Blouse:  RV01, RV93, RV95, RV00.  
 I bridged the 95 and 99 in order to make it blend well.   
Copic Multiliner Purple 0.3mm.  
Jeans/Socks:  BG75, BG72, BG70, Colorless Blender
Shoes:  C00, C1, C3, Turquoise Copic Multiliner 0.3 mm 
and 
Copic Gray Multiliner 0.3mm

 The Clear  Pillow Boxes  come in a variety of  sizes.    I like the 5.5  in x 3.5  in  size because it holds a LOT of chocolate.....and who doesn't like chocolate!   The image and tag  can be changed to fit any occasion.   It is simple to do and Hershey Nuggets fit just perfect.   Yummmm!   

Thank you so much for visiting.  Don't forget to stop back tomorrow and see what surprise Kelli has in store for you!


3/28/12

Three New Projects

Hi everyone! Samantha here & I just wanted to share some of my recent projects with you. I have been coloring up a storm lately. I hope that you enjoy the inspiration.

First, I made an Easter card using an image I had colored a while ago. This is from La-La Land Crafts, called Marci With Bunny. In a previous post, I showed how I colored her hair. You can watch my video by clicking here!
Copic Colors Used:

  • Hair: Y000, Y00, Y21, Y23
  • Skin: E0000, E000, E00, E01
  • Clothing: YR00, YR12, YR14, G40, G43, R81, R83, and R85

Here is a close up of my coloring.


Next, I made a cute little spring scene with the Sitting Lovely stamp set from The Greeting Farm. This set contained this adorable sitting Anya and the flower stamp I used for the flowery hillside.
The sentiment was made using the Mix n Match Sentiments: Occasions stamp set from SP & Company. The three words are separate stamps in the set so you can arrange the words in this set any way you like.

Here is a close-up of my coloring:


My next card features a new Wild Rose Studio stamp, called Annabelle in the Meadow.
The patterned paper is from the coordinating Wild Rose Studio 6x6 paper pad called Annabelle's Meadow. I drew my color scheme from these patterned papers that I used on my project.

I used the following Copic colors:
E00, E21 (for the skin), E15 (for the hair), E57, E59 (for the dog)
Y23, Y26 (for the hat and apron), Y13 (for the birds)
YG61 (for the greenery), B00 (for the flowers)
RV10, RV11, RV13 (all for the outfit and pink flowers)
Spica Glitter Pens #2 and #6

I also added some ribbon & a cute button & twine from the Trendsetters Buttons & Twine set from Webster's Pages. The button is a cardboard adhesive backed button. So easy to work with because it just stuck right to the ribbon.

Here is a closer look at my coloring:


Have a great day! Marie will be back tomorrow with something amazing to share!!

3/26/12

Tips and Tricks Tuesday - Baby Shower


Michelle here... and in my iCopic post today, I'm sharing a few tips and tricks.

TIP #1 - You don't need to use an image on your card....I went with a simple Magnolia image called Baby Shower.

TIP #2 - Use elements from your designer paper to embellish your card.  The designer paper on this card is from My Mind's Eye Be Amazing Collection.

TIP #3 - Save bits and pieces from your everyday life, you never know how you can use them to embellish a project.  My bits on this card?!  The funky little bows! It was thread that came off of a skirt that shouldn't have!  Rather than pitch it, I stashed it and I used it!  SCORE!

TIP #4 - Think about using your embellishments in ways other than the obvious.  On this card I used Prima Marketing's Wood Buttons.  The heart, the way it was meant to be, and the circle I flipped over and used the back to add a totally different feel to the element.

Michelle Pearson - Inspiration Blooms

iCopic Weekly Challenge #75 - Yellow Greens!

Hi everyone, Melissa here, and welcome to our next challenge!

Please remember these are COPIC coloring challenges so you must use your Copics :)

The Challenge: Yellow Green Family
Yellow Greens!  These Copic colors are often overlooked but what better colors are there than these fabulous SPRINGY colors in the YG family!? Pull out your YG Copics and color something for your next project!

To join this week's challenge just add a direct link to your challenge project below. Projects are due on Sunday, April 1st at noon PST. A winner will be chosen at random to receive this week's prize. The winner and top 3 picks be showcased right here on the iCopic blog Sunday evening!  We will also announce our weekly commenting winner too (chosen at random from all the comments left on the blog this week, so be sure to leave us some love)!

We're adding a NEW RULE, because we want our challenges to be for iCopic customers and loyal fans . All challenge projects must be newly created JUST for the iCopic Challenge (if your post title or first couple of sentences is promoting a different challenge, then your project probably wasn't created just for us!). You may enter your project into additional challenges, but excessive challenge pile-ons (more than 7-8 additional challenges) will be removed and not eligible for our prize or top 3.
 
This week's prize is a special $15 gift voucher!


For the inspiration card today, I created this fun simple card using the NEW pre-order stamp set Hey There Kaylee from Some Odd Girl.

The set includes many fun stamps but I chose to showcase the YG's with the little turtle that comes in the set. 

The image was stamped with Memento Ink on X-Press It blending paper.   The following Copics were used for the entire card.  YG11, YG13, YG17, YG63, YG67, YG93, YG95, YG97, W1, W3, W5, W7 and R20, R22
If you don't have any YG Copics you can check them out right HERE!  I also added some beautiful  Twine that's also available at iCopic!

Now, it is your turn! Show us what you can do with the YG Family Copics. Add a direct link to your project below:


3/25/12

iCopic Weekly Winners #74

Hi everyone! Samantha here with this week's winners to announce!

The winner of iCopic Weekly Challenge #74 is. . .
Congrats, Karin! Please email us at info@icopic.com with the following subject line "iCopic Weekly Winner #74".


Our commenting winner is. . .
Laura says:
Your cards are all wonderful!! Love the different hair colors, and the detail on the "camo" pants on the second one... brilliant!!

Congrats, Laura!!  Please email us at info@icopic.com with the following subject line "iCopic Comments Winner #74".

And our top 3 picks for our last challenge are. . .


Thanks everyone for joining us!! Melissa will be back tomorrow to announce our next challenge. Have a great evening and see you soon!


3/24/12

Saturday Spotlight

Hi everyone! Samantha here bringing you our new Saturday Spotlight. Every other Saturday, we spotlight a project from one (or more) of our gorgeous customer projects from our Facebook page. Here is our spotlight:

Karen Pimblett 


Thanks for stopping by! We will have another spotlight in two weeks so keep uploading and sharing your projects on the iCopic Facebook page! We might just spotlight you! 

3/23/12

Baby Card

Happy Friday iCopic Lovers! It's Sheri here and I'm here with a card for the iCopic Flower Challenge. Isn't this a sweetheart of an image from Wild Rose Studio? The stamp is New Baby form Wild Rose Studio and can be found in the iCopic store, right here.
Additional Supplies:
I also wanted to share with you a little tip on how I keep my markers clean and shiny. I just pour a bit of everyday old rubbing alcohol on a cotton ball or a piece of felt and rub the the marker case. The ink comes right off just like magic. :)

 That is it for me today! Have a wonderful weekend and thank so much for visiting!

3/22/12

Simple Easel Card

Hi, everyone!  Kelli here today and I have a fun easel card to share with you!  I used the new Stamping Bella - Uptown Girl Felicity and Blair stamp which I stamped in Memento - Tuxedo Black Ink.  Who doesn't love a little wine and cupcakes with a good friend?  Hehe.  :)
The main image and sentiment come as a set which I love.  There are lots of tiny details on this image, but it's drawn a little whimsically so I don't think your coloring has to be perfectly inside the lines.  Mine definitely isn't as you can see.  :)
The Copics I used were:
B000, B21, B23, B24, B26, B32
C1, C3, C5
E000, E00, E21, E23, E25, E27, E31, E51
G20, G21, G24, G28
R20, R22, R29
RV29
Y11, Y13, Y23, Y35
All the patterned paper I used is from the Echo Park - This & That Graceful 6x6 Paper Pad.  I love Echo Park papers, you should definitely check them out HERE!
I sponged all the white edges with a little light brown ink to help soften the brightness so it went better with the patterned paper pad.  To finish it off I added a few rolled rosettes on the bottom right.
Thanks so much for stopping by, have a great day!  :)


3/21/12

Let's Get a Little Whimsy


A big "hello" to all you Copic Lovers!  Marie here and I am excited to  share my little whimsical bookmark with you.    I selected the adorable little Penny Johnson image by Stampavie called Sweet Dreams.

Copics:  G28, YG63, G40

When I was taking my Standard and Intermediate Copic Certification classes with Marianne Walker last November, I smile as I remember her saying,  - "Marie, you learned your lessons well.  You are doing an excellent job with Copics and you learned all the rules.  But your work is boring.  People will not keep their eyes on it for an extra long time.   Now you need to break the rules!"   Wow!  OK.   So I have looked at many different people's work and tried to find ways to "break the rules". 


I decided to add some "fun and whimsy" to my work.   I grabbed a 0.3mm  Olive Copic Multiliner and started doodling.    It feels fun and carefree to do this and  gives an interesting little effect to the image. You can use the same color or change colors and provide greater color variations.   Maybe you will want to mix it up!   Either way  - it's fun to just see all the different and crazy things you can do with Copic markers and multiliners!  

I hope you enjoyed this bookmark.   Stop by tomorrow and see what wonderful Kelli has in store for you!   

Hugs,
Marie XX

3/20/12

Tuesday Tips & Tricks: One Image, Three Ways

Hi everyone! Samantha here with Tuesday Tips and Tricks.

Today, I am going to share THREE cards in the same post, because I want to show you three examples of how to use the same stamped image!  Generally, there are three "looks" you can achieve with a lined image stamp, when you are making that image stamp the focal point of your project. With our Copic coloring projects, it is great to have options for making your images more versatile.

On all my cards today, I used the spunky Creeper Crew Madden from The Greeting Farm. I just love her spunky, rocker attitude!! I had a lot of fun making these cards and it brought out my inner punk rocker, lol. 


First up: White edge
In the first example, I fussy cut around Madden using an Xacto knife, but I left a white edge around the image. Sometimes the white edge just gives your image that "clean" and defined look. Notice my little Madden doesn't just blend in with that colorful background. The white edge really makes the image POP off the page.
Close up of my coloring.
 For this image I used the following Copics:
  • Hair: G40, G43
  • Eyes: G46
  • Eyeshadow: E43
  • Pants: G43, G46
  • Skin: E000, E00, E11, E02
  • Pink Clothing: RV25, RV29

2nd: No White
On this image, I fussy cut around the image, except this time, I left NO white edge. Leaving no white edge allows your stamped image to blend in with it's surroundings better. I would definitely use this technique if I was creating a scene on a card. I used this technique on this card because all of the colors on the card are DARK and I didn't want the white edge to stand out.
Close up of my coloring.
  For this image I used the following Copics:
  • Skin: E0000, E01, E42, R01, E53
  • Hair: E07, E07, E19, E39
  • Pants Clothing: YG93, YG97, E44, RV29, G12
  • Eyes: G12

Finally: No Fuss
And for the rest of the time, when you don't feel like fussy cutting, there is the plain old simple shaped image! Not every card has to have a fussy cut image on it. In fact, I think that the squares like this are perfectly fine. Sometimes you could change it up by using an oval shape or circle shape. NOTE: I think it is always good to "ground" your image, by coloring a little bit of shadow or flooring under their feet so they don't look like they are floating.
Close up of my coloring.
  For this image I used the following Copics:
  •  Skin: R000, R00, R01
  • Hair: RV63, RV66
  • Clothing: RV09, RV19, BG05, BG07, BG09, BG72, BG75, BG78, YR09, YR14, C9, C6
  • Shadow/Floor: C1, C6
  • Eyes: E13


So there ya have it, one image, 3 different ways of using it on your projects.

TwitterFacebookFavorites More